

When it comes to ensuring the integrity and functionality of various equipment and systems, a seal mat plays a crucial role. As a leading seal mat supplier, I'm here to guide you through the installation process of a seal mat, providing you with detailed steps and important considerations.
Understanding the Seal Mat
Before we dive into the installation process, it's essential to understand what a seal mat is and its applications. A seal mat is typically made of rubber or other flexible materials and is designed to create a tight seal between two surfaces. It can be used in a wide range of industries, including automotive, electrical, and industrial manufacturing. Seal mats help prevent the leakage of fluids, gases, and dust, and they also provide insulation and shock absorption.
Tools and Materials Needed
To install a seal mat, you'll need the following tools and materials:
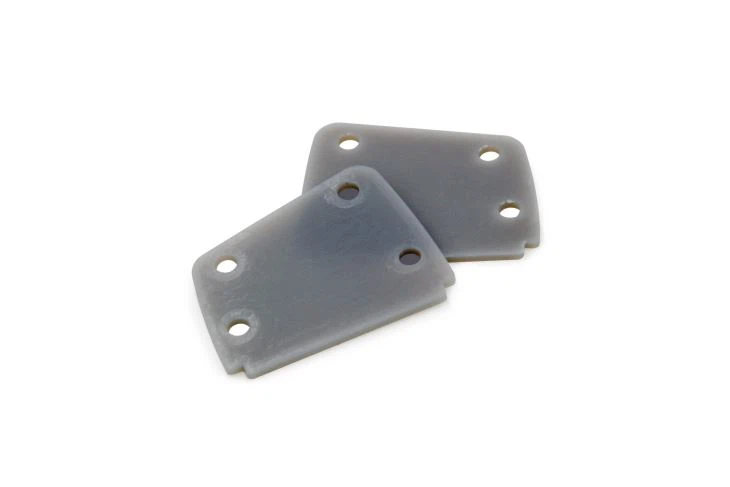

- Seal mat: Choose the appropriate size and material for your application. You can explore our Long-life Socket Insulation Cable Motor Waterproof Rubber Pad or Long-life Insulation Electric Audio Shock Seal Rubber Pad Mat for high - quality options.
- Cleaning supplies: Such as a mild detergent, water, and a clean cloth to clean the surfaces where the seal mat will be installed.
- Adhesive: Depending on the type of seal mat and the surface, you may need a suitable adhesive. Make sure to choose an adhesive that is compatible with the seal mat material and the surface it will be attached to.
- Measuring tools: A tape measure or ruler to ensure the proper placement and sizing of the seal mat.
- Cutting tools: A sharp utility knife or scissors to cut the seal mat to the correct size.
Step - by - Step Installation Process
Step 1: Surface Preparation
The first and most crucial step in installing a seal mat is to prepare the surfaces where the mat will be placed. Start by cleaning the surfaces thoroughly to remove any dirt, grease, oil, or debris. Use a mild detergent and water to clean the surfaces, and then dry them completely with a clean cloth. Any contaminants on the surface can prevent the seal mat from adhering properly and may lead to leaks.
Step 2: Measure and Cut the Seal Mat
Measure the area where the seal mat will be installed using a tape measure or ruler. Make sure to measure accurately to ensure a proper fit. Once you have the measurements, use a sharp utility knife or scissors to cut the seal mat to the correct size. It's better to cut the mat slightly larger than the measured area and then trim it to fit precisely during the installation process.
Step 3: Apply Adhesive (if required)
If your seal mat requires an adhesive for installation, apply the adhesive evenly to the surface where the mat will be placed. Follow the manufacturer's instructions for the adhesive, including the recommended drying time. Some adhesives may need to be left to dry for a certain period before the seal mat can be applied.
Step 4: Place the Seal Mat
Carefully place the cut seal mat on the prepared surface. Start from one end and gradually lay the mat down, smoothing out any wrinkles or air bubbles as you go. If the seal mat is being installed in a corner or around a curve, you may need to make small cuts or folds to ensure a proper fit.
Step 5: Press and Secure
Once the seal mat is in place, press it firmly against the surface to ensure good adhesion. You can use a roller or your hands to apply even pressure across the entire surface of the mat. Make sure the edges of the seal mat are properly sealed and there are no gaps or loose areas.
Step 6: Trim Excess Material
After the seal mat is installed and secured, use a sharp utility knife to trim any excess material around the edges. This will give the installation a clean and professional look.
Important Considerations
- Temperature and Humidity: The installation environment can affect the performance of the seal mat and the adhesive. Make sure to install the seal mat in an environment with the appropriate temperature and humidity levels as recommended by the manufacturer.
- Compatibility: Ensure that the seal mat material is compatible with the substances it will come into contact with, such as chemicals, fluids, or gases. Using an incompatible material can lead to degradation of the seal mat and reduced performance.
- Maintenance: Regularly inspect the seal mat for any signs of wear, damage, or leakage. Replace the seal mat if necessary to maintain its effectiveness.
Conclusion
Installing a seal mat is a relatively straightforward process, but it requires attention to detail and proper preparation. By following the steps outlined above and considering the important factors, you can ensure a successful installation of the seal mat. As a seal mat supplier, we are committed to providing high - quality products and excellent customer service. If you have any questions about our seal mats or need assistance with the installation process, please feel free to contact us for further discussion and potential procurement. We look forward to working with you to meet your seal mat needs.
References
- Manufacturer's instructions for seal mats and adhesives.
- Industry standards and best practices for seal mat installation.